 Sudden Valley Siding
 Why Decks in Columbia Take More Punishment Than People Expect
Homes in the Columbia area near Sudden Valley sit in a pocket of Whatcom County that stays wet for most of the year. Moisture-laden air moves through the region for months at a stretch, driving rain comes in sideways during fall and winter storms, and anything with a flat or horizontal surface — decking boards, ledger connections, stair treads — spends a long moss season collecting the kind of green film that makes wood slick and traps water against the surface underneath it. A deck built to a generic national spec, without accounting for that pattern, will show problems years before it should: soft spots near the house, black staining under railings, and moss growth in the shaded, low-airflow zones under and around the structure.
None of that is unusual for the area, and none of it means decks don't work here. It means the details that get skipped on a rushed job — flashing, fastener choice, drainage slope, gaps between boards — matter more in Columbia than they would in a dry climate, because there's no dry stretch of the year to let a mistake air out before it starts rotting.
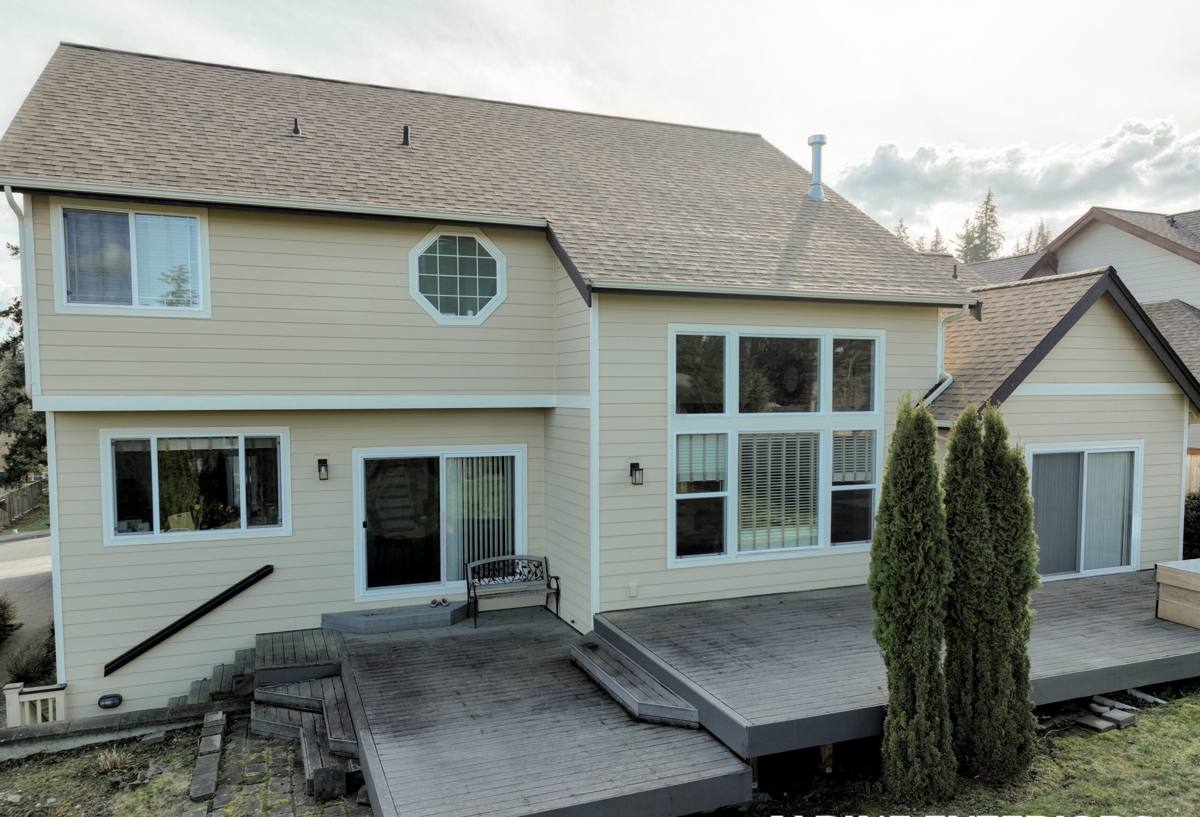
What a Deck Built for This Climate Actually Needs
A deck that's going to hold up through repeated Whatcom County winters needs a few things baked in from the start, not added later:
- Ledger flashing that sheds water away from the house wall instead of trapping it against the rim joist
- Joist spacing tight enough to prevent decking from bouncing or cupping under moisture cycling
- Corrosion-resistant fasteners and hardware rated for treated lumber, not standard-grade screws that react with the chemicals in modern pressure-treated wood
- A slight slope away from the house so water doesn't pool against the structure
- Gaps between boards sized for drainage and for the wood movement that comes with a wet-dry cycle
- Open airflow underneath the deck so the framing can dry out between rain events instead of staying damp
Skip any one of these and you're not looking at a failure right away — you're looking at a five-to-ten-year head start on rot, rust streaking, or a spongy deck surface that shows up right when the deck should still have decades of life left.
The Difference Between "Looks Finished" and "Built Right"
A deck can look complete the day it's built and still be set up to fail early. The parts that determine long-term performance — ledger flashing, joist hanger hardware, under-deck drainage — are mostly invisible once the decking boards go down. That's exactly why they're the parts most likely to get shortcut on a fast, low-bid job, and exactly where we spend the most attention.
The Ledger Board Connection — Where Most Deck Failures Start
If a deck attaches to the house, the ledger board is the single most important connection on the whole structure — both structurally and for moisture control. It has to be lag-bolted or through-bolted into the house framing correctly, and it has to be flashed so that water running down the siding or off the roof is directed away from that connection point rather than into it.
In a climate with this much sustained rainfall, a poorly flashed ledger board doesn't fail dramatically — it fails quietly. Water gets behind the flashing, soaks into the rim joist and the house sheathing behind it, and by the time anyone notices soft framing or staining on the siding, the damage has been building for years. This is one of the most common problems we find when we're asked to inspect or repair an older deck in the Sudden Valley area, and it's almost always tied back to flashing that was skipped or installed incorrectly at the original build.
Decking Material Options: What Actually Holds Up Here
There's no single "correct" decking material — it's a trade-off between upfront cost, maintenance commitment, and how the material behaves in sustained moisture. Here's how the common options compare for a property in this climate:
| Material | Upfront Cost | Maintenance | Moisture Behavior |
|---|---|---|---|
| Pressure-treated lumber | Lowest | Needs re-staining/sealing every 1–2 years | Resists rot when sealed; checks and warps if maintenance lapses |
| Cedar | Moderate | Regular sealing to keep natural rot resistance intact | Naturally decay-resistant but still needs upkeep in constant moisture |
| Composite decking | Higher | Low — periodic cleaning, no staining/sealing | Doesn't rot, but can develop surface mold/moss film without occasional cleaning |
| PVC/capped polymer | Highest | Lowest | Fully moisture-resistant surface; framing underneath still needs to be built and vented correctly |
Composite and PVC decking get marketed as "maintenance-free," and structurally that's close to true — but no decking material is immune to moss and surface algae in a climate this wet. Even the best synthetic decking will develop a slick green film in shaded, low-airflow areas if it's never cleaned. The material choice affects how often you maintain the surface; it doesn't remove the need to manage moisture and airflow underneath the structure.
Drainage, Slope, and Managing Moisture Under the Deck
A lot of deck problems in this area have nothing to do with the decking boards themselves and everything to do with what's happening underneath. Low decks built close to grade, or decks with landscaping or structures that block airflow underneath, create a shaded, damp microclimate that never fully dries out between storms. That's where you'll see moss creep up support posts, mildew form on the underside of framing, and — over time — accelerated rot in ground-contact posts even when they're rated for it.
Correct drainage planning includes grading the ground under the deck so water moves away rather than pooling, keeping vegetation clear of the underside, and, on lower decks, sometimes installing an under-deck drainage system so the space below can be used without getting soaked every time it rains. None of this is exotic work, but it has to be planned into the build — retrofitting drainage under an existing deck is possible but considerably more involved than doing it right the first time.
Permits, Codes, and Inspections in Whatcom County
Most deck construction in unincorporated Whatcom County — which covers the Sudden Valley area — requires a building permit once the deck is attached to the house or exceeds a certain height and size, and inspections at key stages (footings, framing, and final) are standard practice. If your property is part of a homeowners association, it's also worth checking whether there are architectural guidelines that apply to exterior structures before finalizing a design. We handle the permitting and inspection process as part of the job so you're not the one tracking down inspection windows or code requirements — but it's worth knowing upfront that a legitimate deck build in this area isn't a weekend, off-the-books project if it's attached to the house.
Our Process for a Columbia Deck Project
- On-site assessment — we look at grade, drainage, sun/shade exposure, and how the deck will attach to the house before recommending a design.
- Material and layout discussion — honest trade-offs between decking materials, sizing, and budget, based on how the space will actually be used.
- Permit and design finalization — we prepare what's needed for the permit process and confirm structural details before any digging starts.
- Footings and framing — set to the correct depth and spacing for the load and soil conditions on your lot, with ledger flashing done correctly the first time.
- Decking, railings, and stairs — installed with the fastening and gap spacing appropriate to the material chosen.
- Final walkthrough and inspection sign-off — so you have a deck that's not just built, but built to pass and built to last.
A Pre-Project Checklist for Homeowners
- Know roughly how the deck will be used (dining, grilling, hot tub, entertaining) — this affects size and structural load
- Check whether your property has HOA or architectural guidelines that apply
- Decide your maintenance appetite before choosing decking material, not after
- Ask any contractor directly how they flash the ledger board and how they handle under-deck drainage
- Confirm in writing whether permitting and inspections are included in the quoted price
Maintaining a Deck Once It's Built
Even a correctly built deck needs some seasonal attention in a climate like this one. A short annual routine goes a long way toward avoiding the early failures that come from neglect rather than bad construction:
- Sweep debris off the deck surface regularly, especially in fall when leaves and needles trap moisture against the boards
- Clean visible moss or algae film before it builds up, particularly in shaded corners and against the house
- Check and clear the space underneath the deck so airflow isn't blocked by stored items or overgrown landscaping
- Re-seal or re-stain wood decking on the schedule appropriate to the product — don't wait until it's visibly weathered
- Inspect the ledger flashing and any visible fasteners once a year for rust staining or gaps
Why a Crew That Already Works in Columbia and Sudden Valley Matters
A deck built to a generic spec sheet, without adjustment for how much sustained moisture this part of Whatcom County actually gets, is set up to underperform from day one. A crew that regularly works properties in the Columbia and broader Sudden Valley area has already seen which details cause callbacks here — the ledger flashing shortcuts, the low decks with no airflow underneath, the fastener choices that streak and corrode faster than they should in this moisture cycle. That's not a marketing point, it's a practical one: it means fewer surprises during the build and a deck that's built for the climate it actually has to survive, not the climate a generic manual assumes.
If you're planning a new deck or need an honest look at one that's already showing its age, we're glad to come take a look. Fill out the form below for a free, no-pressure estimate.