 Sudden Valley Siding
 Why Alger Homes Are Hard on Windows
Homes around Alger sit in a pocket of the Pacific Northwest that windows simply were not designed for a generation ago. You've got salt-laden air drifting in off the water, wind-driven rain that doesn't just fall straight down but gets pushed sideways into wall assemblies, and a moss season that stretches for months, keeping everything damp long after a storm has passed. None of these are exotic problems, but together they wear down window assemblies faster than in drier inland climates, and they punish sloppy installation work in ways that show up years later as rot, fogged glass, or a heating bill that never seems to drop.
Old aluminum-frame windows from the 1970s and 80s are especially common casualties out here. Aluminum conducts cold straight through the frame, so on a wet, windy evening the inside of the frame sweats, and that moisture finds its way into the surrounding wood trim and sheathing. Add salt air's corrosive effect on hardware and weatherstripping, and you end up with windows that look fine from the driveway but are quietly failing where you can't see them.
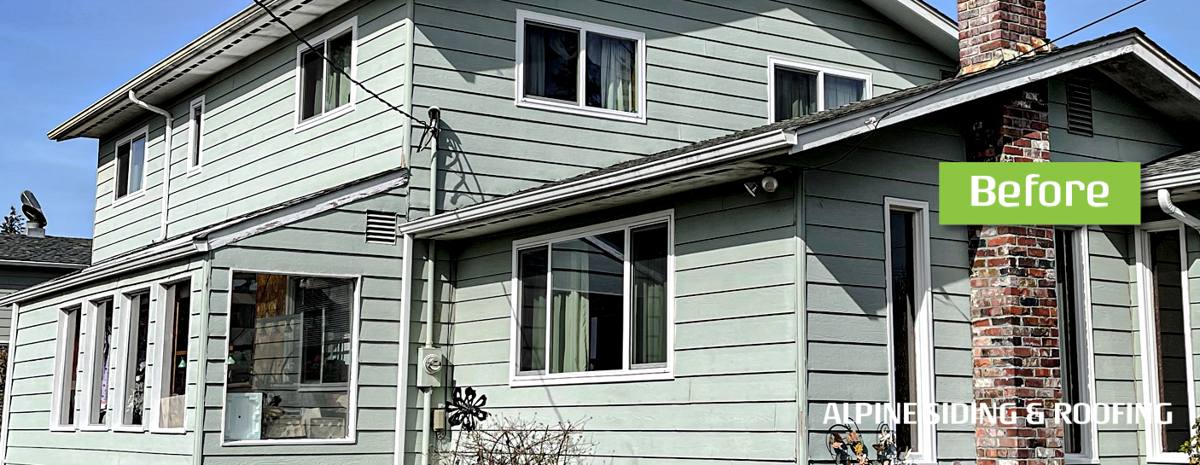
What "Energy-Efficient" Actually Means Here
Energy-efficient windows aren't a single product — they're a combination of glazing, gas fill, frame material, and installation quality, and the right mix depends on the climate they're going into. For the Alger area, we're less worried about extreme summer heat gain (this isn't Phoenix) and more concerned with keeping conditioned air in, blocking wind infiltration, and resisting the moisture load that comes with a wet coastal climate for most of the year.
The Numbers That Matter
Two ratings tell you most of what you need to know:
- U-Factor — measures how well the window resists heat loss. Lower is better. In our climate, look for a U-factor of 0.30 or lower for a meaningful upgrade over old single or early double-pane units.
- SHGC (Solar Heat Gain Coefficient) — measures how much solar heat passes through. Because our winters are long and gray, a moderate SHGC (rather than the ultra-low numbers used in hot climates) usually strikes the right balance, letting in some free winter warmth without overheating rooms with west-facing glass in summer.
Beyond the ratings, double-pane glass with a low-E coating and an argon gas fill is the practical standard for this region now. Triple-pane is worth discussing for homes with a lot of west or north exposure to wind, but it adds cost and weight that isn't always justified on a typical single-story remodel.
Frame Material Trade-Offs in a Salt-Air, Wet Climate
| Frame Material | How It Handles This Climate | Trade-Offs |
|---|---|---|
| Vinyl | Doesn't corrode or rot; good thermal performance; low maintenance | Can look less premium; quality varies a lot between manufacturers |
| Fiberglass | Very stable in temperature swings; strong resistance to moisture and salt exposure | Higher upfront cost than vinyl |
| Wood-clad | Warm appearance, good insulator | Cladding seams and cut ends are vulnerable to wind-driven rain if not detailed correctly; more upkeep |
| Aluminum | Strong and slim sightlines | Poor insulator, prone to condensation and corrosion near salt air — we don't recommend it for this area's homes |
We steer most homeowners in this area toward vinyl or fiberglass for the simple reason that they hold up with the least maintenance in a climate that stays damp for months at a stretch. Wood-clad can still be the right call for a specific look, but it needs more careful flashing and more attention over the years.
The Part That Actually Determines Success: Installation
Here's the truth about window failures we see on service calls: it's rarely the glass or the frame that fails first. It's the installation — specifically, how the window was flashed and sealed into the wall opening. A great window installed poorly will leak. A mid-grade window installed correctly, with proper flashing tape, sill pans, and integration with the house wrap and siding, will outperform it for decades.
Because we're a siding contractor first, we look at every window replacement as part of the whole wall assembly, not an isolated swap. That matters a lot here, where wind-driven rain gets forced sideways and upward under poorly lapped flashing. Our approach on every window job includes:
- Removing enough surrounding siding and trim to inspect the sheathing and framing underneath for hidden rot before setting the new window
- Installing a sloped sill pan so any water that does get past the glazing drains back outside instead of sitting on the sill
- Flashing tape applied in the correct shingle-lap order (sill, jambs, then head) so water is always directed downward and outward
- Proper integration with the house wrap or building paper — lapped correctly, not just taped over the top
- Low-expansion foam or backer rod and sealant at the perimeter, sized for the gap, not overfilled or underfilled
- Re-flashing and re-installing trim and siding so the finished look matches the rest of the wall and sheds water correctly at every joint
Signs Your Current Windows Are Costing You
Homeowners often wait too long on windows because the problems are gradual. Here's what to check for:
- Visible fog or moisture between the panes of double-glazed windows — the seal has failed and the insulating gas is gone
- Condensation forming on the inside of the glass or frame during cold, wet weeks
- Soft or discolored wood trim or sill, especially on the sides that face prevailing wind and rain
- Drafts you can feel with your hand near the frame on a windy day
- Windows that are difficult to open, close, or lock — often a sign the frame has swollen or shifted
- Visible moss or dark streaking building up on the frame or sill faster than on the rest of the wall
- A noticeable difference in room temperature near the window compared to the rest of the house
Any one of these on its own might not mean much. Several together, especially on the weather-facing side of the house, usually mean it's time for a real inspection rather than another round of caulk.
Our Process, Start to Finish
1. On-Site Assessment
We walk the exterior with you, look at each window from both inside and out, and check the condition of the surrounding wall — not just the window itself. If we're already doing siding work nearby, we'll flag any windows worth addressing at the same time to avoid opening the same wall twice.
2. Straightforward Recommendation
We'll tell you honestly which windows need full replacement, which could be serviced or re-sealed, and which are fine for now. We're not going to sell you eight new windows when two need attention.
3. Removal and Inspection
Old windows come out carefully, and we inspect the framing and sheathing underneath before anything new goes in. This is the point where hidden moisture damage, if any, gets caught and addressed rather than sealed over.
4. Correct Installation
New windows are set level, plumb, and square, then flashed and sealed using the sequence described above. Siding and trim are reinstalled to match, so the finished wall performs as one system.
5. Walkthrough
We show you the finished work, confirm everything opens, closes, and locks properly, and answer questions about care going forward.
Cost Factors Homeowners Ask About
Every window job is different, but the price generally comes down to a handful of variables. This is meant as a general guide to help you budget conversations, not a quote:
| Factor | Why It Affects Cost |
|---|---|
| Frame material | Vinyl is typically the most affordable; fiberglass and wood-clad cost more upfront |
| Window size and configuration | Large picture windows, bays, and custom shapes cost more than standard sliders or double-hungs |
| Condition of the wall behind the window | Hidden rot or damaged sheathing found during removal adds repair scope |
| Number of windows done at once | Bundling multiple windows in one visit usually costs less per window than doing them one at a time |
| Trim and siding tie-in | Matching existing trim profiles or siding material adds labor beyond the window itself |
Why a Crew That Already Works This Area Matters
Whatcom County's coastal weather isn't the same everywhere in the county, but the general pattern of driving rain, salt air, and a long wet season holds across the Alger area and the surrounding communities. A crew that installs windows here regularly knows to check for the specific rot patterns that show up on wind-exposed walls, to size flashing details for sustained wind-driven rain rather than the occasional downpour, and to recognize when moss buildup on a sill is cosmetic versus a sign of a bigger moisture problem underneath. That local pattern-recognition is worth more than a slightly lower bid from a crew that mostly works drier, more sheltered areas.
It also means we're not learning on your house. We've already worked through the flashing sequences, material choices, and inspection habits that hold up in this climate, on other homes nearby, before we ever show up at yours.
Living With Your New Windows in a Wet, Mossy Climate
Even the best window benefits from a little seasonal attention here:
- Rinse frames and tracks periodically to clear salt residue and organic buildup before it holds moisture against the frame
- Keep weep holes on vinyl and fiberglass frames clear of debris and moss so water can drain out instead of pooling
- Check exterior caulk lines once a year, especially after a hard winter, and have any cracked sealant redone before it lets water behind the trim
- Trim back vegetation or moss growth that's shading a window and keeping it damp longer than the rest of the wall
None of this is heavy maintenance — it's the kind of upkeep that takes an hour a year and adds real life to the investment.
If your windows are fogging, drafty, or just old enough that you're wondering whether it's time, we're glad to come take a look. The estimate is free, there's no pressure, and you'll get a straight answer about what actually needs doing — use the form below to get started.